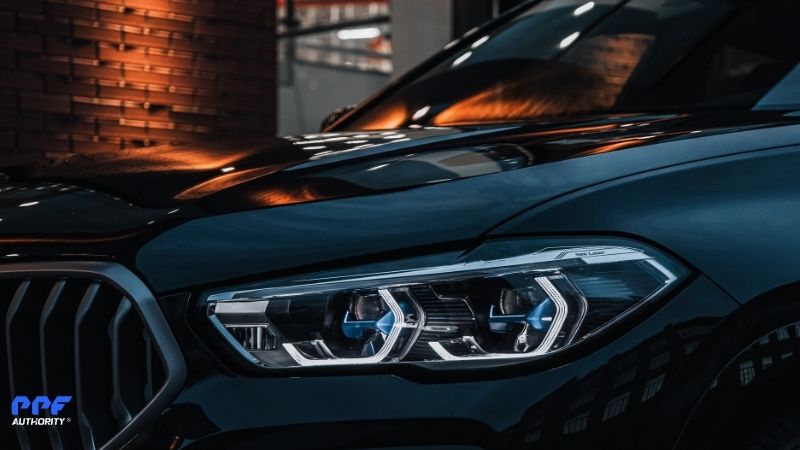
What Is Slate PPF?
Slate PPF is a lightly tinted protective film designed for automotive lights. It adds a sleek gray tint to your headlights and tail lights while providing a durable barrier against environmental damage, scratches, and fading. Its popularity stems from its ability to combine aesthetics with protection, making it a favorite among car enthusiasts and everyday drivers.
The Installation Process for Slate PPF
Installing Slate PPF requires attention to detail, proper tools, and expert technique. The process involves several steps to ensure a seamless application:
1. Preparation and Cleaning
- The lights are thoroughly cleaned to remove dirt, grime, and oil that could interfere with the film’s adhesion.
- Even microscopic debris can cause imperfections, so a clean surface is essential.
2. Film Cutting
- Slate PPF is either pre-cut using a computerized plotter or trimmed during installation to fit the specific shape of the lights.
- Precision cutting ensures full coverage and eliminates the risk of overlap or exposed areas.
3. Application
- The installer applies the film using a solution that allows for positioning adjustments.
- A squeegee is used to press the film onto the surface, removing any trapped air and ensuring a tight seal.
4. Finishing Touches
- Edges are trimmed and secured to prevent peeling.
- The film is inspected for imperfections, including bubbles or wrinkles.
Why Air Bubbles in Slate PPF Are a Problem
Air bubbles are one of the most common issues during PPF installation, and they can have a significant impact on both the appearance and performance of the film.
1. Diminished Aesthetic Appeal
- Unprofessional Look: Air bubbles create unsightly distortions, making the film look uneven and poorly applied.
- Distracting Appearance: Instead of a sleek, tinted finish, bubbles draw attention and detract from the overall look of your vehicle.
2. Compromised Protection
- Reduced Adhesion: Bubbles prevent the film from adhering fully, leaving areas vulnerable to damage.
- Weakened Barrier: Gaps created by air bubbles allow dirt, moisture, and contaminants to seep under the film, undermining its protective properties.
3. Shortened Lifespan
- Peeling and Lifting: Bubbles can cause the film to lift around the edges, leading to peeling and reducing the film’s lifespan.
- Cracks and Wrinkles: Over time, bubbles may expand or harden, creating cracks and wrinkles in the film.
4. Visibility Issues
For headlights, bubbles can distort light output, reducing visibility and potentially compromising safety.
How Professionals Prevent Air Bubbles During Installation
1. Proper Preparation
- Professionals meticulously clean and prepare the surface to ensure no dust, dirt, or grease interferes with adhesion.
- They work in controlled environments, free from airborne particles that could create imperfections.
2. Use of Advanced Tools
- Squeegees and Heat Guns: Essential for smoothing the film and ensuring all air pockets are eliminated.
- Plotters for Precision Cuts: Pre-cut templates ensure the film fits perfectly, minimizing the need for adjustments that can trap air.
3. Expert Technique
- Professionals apply even pressure with the squeegee, working from the center outward to push out air and excess solution.
- They adjust the film carefully to prevent stretching or misalignment, which can lead to bubbles or creases.
Why DIY Installation Often Results in Air Bubbles
While DIY installation kits are widely available, achieving a flawless finish without professional experience is challenging. Common mistakes include:
- Improper Cleaning: Even a small speck of dirt can create an air bubble.
- Uneven Pressure: Inconsistent squeegee pressure can leave pockets of air trapped under the film.
- Lack of Tools: Without professional tools like heat guns and plotters, it’s difficult to achieve a smooth, bubble-free application.
- Inexperience: Novice installers may not recognize or correct bubbles during the application process, leading to long-term imperfections.
The Importance of Professional Installation
1. Flawless Appearance
Professional installers have the tools and expertise to eliminate air bubbles, ensuring the Slate PPF looks seamless and enhances your vehicle’s style.
2. Optimal Protection
By eliminating bubbles, professionals ensure the film adheres properly to the surface, maximizing its protective capabilities.
3. Long-Lasting Results
Proper installation prevents peeling, lifting, and other issues that reduce the film’s durability.
4. Warranty and Support
Many professional shops offer warranties on their work, giving you peace of mind and protection against potential issues.
How to Maintain Your Slate PPF After Installation
To keep your Slate PPF looking and performing at its best:
- Avoid Washing Immediately: Wait 7–10 days after installation before washing your vehicle to allow the film to fully cure.
- Use Gentle Cleaners: Opt for pH-neutral soaps and microfiber cloths to clean your lights.
- Inspect for Damage: Check periodically for signs of peeling or lifting and address issues promptly with your installer.
Conclusion
Installing Slate PPF is a smart investment in both style and protection for your vehicle’s headlights and tail lights. However, achieving a flawless finish requires professional precision to avoid air bubbles and ensure the film adheres perfectly to the surface. Air bubbles not only ruin the aesthetic of the film but also compromise its protective properties and shorten its lifespan.
By choosing a professional installer with the right tools and expertise, you can enjoy sleek, durable, and bubble-free results that Slate PPF is designed to deliver. Don’t take chances with your vehicle—trust the pros to get it right the first time.